Can I Hang a Backdrop with Command Strips? Tips for Easy Setup
When planning a celebration, adding a beautiful backdrop can elevate the entire atmosphere. You might wonder, are command strips a great option for hanging backdrops easily and without damaging your walls? They come in various strengths, making them perfect for a range of materials.

If you’re a DIY enthusiast, command strips make decorating simple. You can quickly set up and take down your backdrop after the event, all while keeping your space intact. This approach is fantastic when you want a stunning visual without the hassle of nails or other tools.
By using command strips, you can focus more on enjoying your celebration and less on worries about the backdrop. Get ready to impress your guests with a stylish setup that’s easy to achieve!
Choosing the Right Command Strips for Your Backdrop

When hanging a backdrop, selecting the appropriate Command Strips is crucial for a successful installation. You will need to consider both the weight of your backdrop and the surface you will be attaching it to. Understanding these factors will help ensure your backdrop stays securely in place.
Understanding Weight Limits
Every Command Strip has a specific weight limit. It’s important to check this before you begin. For lightweight fabric backdrops, standard Command Strips can work well. However, if you’re using heavier materials, consider using heavy-duty Command Strips for better support.
Here’s a quick reference:
| Command Strip Type | Weight Limit |
|---|---|
| Small Strips | Up to 1 lb |
| Medium Strips | Up to 3 lbs |
| Large Strips | Up to 5 lbs |
| Heavy-Duty Strips | Up to 16 lbs |
Knowing the weight of your backdrop will help you choose the right strips. If in doubt, opt for a stronger option to avoid any mishaps.
Surface Compatibility
Not all surfaces are suitable for Command Strips. You’ll want to ensure the area you plan to use is smooth, clean, and dry. Command Strips work best on surfaces like painted walls, smooth wood, and tiles.
Avoid applying strips to:
- Rough Surfaces: These can prevent the adhesive from gripping properly.
- Textured Walls: The uneven texture makes it hard for strips to stick.
- Freshly Painted Walls: Wait at least a week for new paint to cure.
Always test a small area first if you are unsure. This way, you can avoid damage to your walls and ensure a secure hang for your backdrop.
Preparing the Surface for Command Strips
To ensure your backdrop hangs securely with Command Strips, it’s important to prepare the surface properly. This involves cleaning the area where the strips will stick and applying them correctly. Here’s how to do it.
Cleaning the Wall
Start by choosing a clean wall space for your backdrop. Dust or dirt can weaken the adhesive on the Command Strips. Use a damp cloth or paper towel to wipe down the area thoroughly.
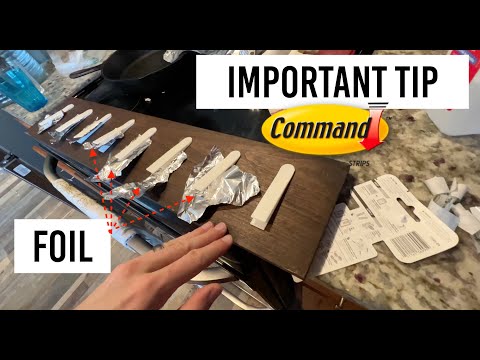
For best results, consider using isopropyl alcohol. It helps remove any grease or residue that may be on the surface. Apply some alcohol to a paper towel and gently rub the area.
Allow the surface to dry completely before moving on. A dry surface helps ensure a strong bond for the Command Strips. Spending this time cleaning will pay off by keeping your backdrop securely in place.
Applying the Strips
Once the wall is clean and dry, it’s time to apply the Command Strips. First, separate the two sides of the strips. One side sticks to your backdrop, and the other attaches to the wall.
Press the strips firmly against the backdrop for at least 30 seconds. Make sure they are adhered well. Next, peel the backing off the wall side of the strips.
Place the backdrop against the wall and press the strips firmly in place. Hold it for another 30 seconds. This extra pressure promotes a strong bond, ensuring your backdrop is secure for your DIY project.
Step-by-Step Backdrop Hanging Process

Hanging a backdrop with Command Strips is a simple and effective method for your next event, such as a party or graduation. Follow these steps to ensure your backdrop is securely and attractively displayed.
Attaching the Strips to the Backdrop
Start by choosing the right Command Strips for your fabric backdrop. If your backdrop is heavier, opt for heavy-duty strips to provide extra support.
Begin by cleaning the area where you will attach the strips. Use rubbing alcohol to remove dust and grease, which helps the adhesive stick better.
Next, apply the Command Strips to the top edge of your backdrop. Space them evenly for optimal support. Make sure to press firmly for about 30 seconds so they adhere well.
After that, peel off the protective backing from each strip. This will expose the adhesive side that will stick to the wall or other surfaces.
Positioning and Securing the Backdrop
Now, it’s time to position your backdrop. Hold it against the wall to find the perfect spot. Make sure it’s centered or aligned according to your decoration plan.
Once you have the backdrop in place, press it against the wall where each Command Strip is located. Apply even pressure for at least 30 seconds to ensure a good bond.
If needed, use Command Hooks on the sides for additional support, especially if your backdrop is particularly large or if you want a more defined look.
Check that everything looks neat and tidy before you step back to enjoy your beautiful setup for your celebration!
Alternative Hanging Solutions and Tips

If you’re looking for different ways to hang a backdrop, several options are available that can suit various needs and preferences. Below are some practical methods and creative ideas to enhance your backdrop display.
Using Curtain Rods for Larger Backdrops
Curtain rods are a great choice for hanging larger backdrops. They can support more weight than command strips and offer flexibility in size and style. Choose a sturdy rod and wall brackets to ensure it can bear the backdrop’s weight.
Installing the curtain rod is straightforward. Simply measure the area where you want to hang it. Mark the wall for the brackets, drill holes, and secure them in place. Then, slide your backdrop onto the rod. This method is especially beneficial for renters, as it leaves minimal damage to walls when using removable wall brackets.
You can also use decorative curtain rods to complement your theme. This adds an extra flair to your display and enhances the overall appearance of your event.
Creative Ideas for Backdrop Decorations
In addition to the traditional hanging methods, consider using command hooks for lightweight decorations. These hooks are easy to apply and remove, making them perfect for renters who need temporary solutions. You can hang fabric banners, fairy lights, or even small framed photos with them.
Another idea is to create a backdrop using a mix of furniture. You can place a large piece of furniture against the wall as a makeshift backdrop. For example, a bookshelf can hold your decorations while also serving as a display for books and photos.
Remember to layer your decorations with different materials like fabric, greenery, or string lights to add depth. This approach promotes a visually appealing backdrop without the need for extensive installations.