How Do You Wrap a Small Gift Nicely? Tips for Perfect Presentation
When it comes to gift-giving, the presentation can make all the difference. To wrap a small gift nicely, start by choosing quality wrapping paper that complements the occasion. Then, add a personal touch that shows your thoughtfulness. Whether it’s for a birthday, a holiday, or just because, taking the time to make your gift special leaves a lasting impression.

Next, be sure to measure the paper so you have enough to cover the gift entirely. Use double-sided tape for a clean finish, and don’t forget to add a cute ribbon or tag. This simple step can elevate your wrapping from ordinary to extraordinary, making your gift stand out during the holiday season or any special event.
Wrapping small gifts doesn’t have to be stressful, and it can even be fun! With a few easy tips and tricks, you can create beautifully wrapped gifts that not only look great but convey your care and attention to detail. So, let’s explore some creative ways to wrap your gifts and spread joy with every package you give!
Selecting Your Wrapping Materials

Choosing the right wrapping materials can really enhance the presentation of your small gift. By focusing on the paper you use, adding decorative ribbons and bows, and incorporating special tags, you can make your gift stand out beautifully.
Choosing the Right Paper
Select wrapping paper that suits the occasion and fits the gift’s personality. Look for options like glossy, matte, or textured paper. Each type gives a different feel.
- Glossy Paper: Great for festive occasions. It has a shiny finish that looks vibrant.
- Matte Paper: Offers a more subtle and elegant appearance. This works well for sophisticated gifts.
- Tissue Paper: Ideal for adding layers inside a gift box for a pop of color.
Don’t forget to consider the size and shape of your gift when choosing paper. Make sure it’s large enough to wrap completely. Using double-sided tape can help you achieve clean edges without visible adhesive.
Ribbons and Bows for Decoration
Ribbons and bows can add flair to your wrapped gift. They come in various materials, colors, and styles. Here are some options to think about:
- Satin Ribbons: Soft and shiny, perfect for a polished look.
- Burlap Ribbons: Great for a rustic feel, especially for handmade gifts.
- Pre-made Bows: They come in many designs and save you time.
When attaching ribbons, try tying a bow around the gift box for a classic touch. You can also create a layered look by using multiple ribbons in different colors.
Special Additions: Tags and Toppers
Adding gift tags and toppers can make your gift unique. Gift tags can be simple or elaborate, depending on your style.
- Gift Tags: Write a personal message or the recipient’s name. Choose tags that match your wrapping materials for a cohesive look.
- Gift Toppers: These can include small ornaments, flowers, or even themed decorations. They add an extra layer of charm.
Consider using double-sided tape to secure tags and toppers neatly. This keeps everything in place and looking sharp. Personal touches like these show you care and make the gift feel special.
Wrapping the Gift
Wrapping a small gift can be fun and rewarding. To make your gift look nice, you’ll want to cut and measure the paper correctly, fold the edges neatly, and use tape effectively to secure everything in place.
Cutting and Measuring Paper
Start by selecting your wrapping paper. Lay your gift on the paper and measure out enough to cover the entire gift plus a little extra. Use sharp scissors to make clean cuts.
Roughly six inches on each side works well for small gifts. This overlap ensures you have enough paper to fold securely. Remember to cut straight lines for a neat appearance. If needed, use the edge of a table or a ruler as a guide. Having your paper the right size is key for a professional look.
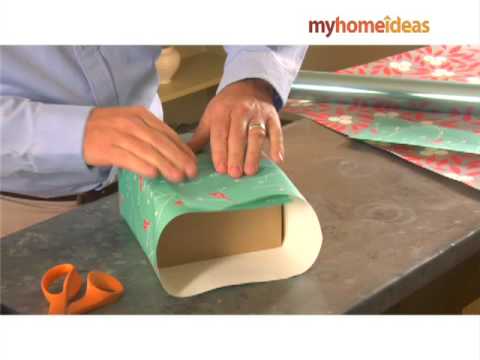
Folding Edges and Creating Clean Seams
Once your gift is wrapped, it’s time to fold the edges. Take the long sides of the paper and bring them over the gift, making sure they overlap slightly. This creates a clean seam.
Next, fold the shorter sides. Push the paper in at the corners to create neat edges. It helps to use a flat surface to keep everything aligned.
After tucking the paper under, smooth out any bumps. A crisp fold makes your gift look polished and well-prepared. Pay attention to the corners; they should look tidy and not be too bulky.
Securing the Wrap with Tape
Once your folds are in place, grab some tape to secure everything. Using strong, double-sided tape can give a clean look without visible tape edges.
Apply tape along the seams to hold the paper firmly. Make sure the edges are flat against the gift, avoiding any wrinkles. If using regular tape, stick it on the top and the sides to hold the paper securely.
Check that all corners are taped down well. A little extra tape won’t hurt, especially on larger gifts. This ensures your wrap stays neat until the moment it’s opened.
Adding the Finishing Touches

Once you’ve wrapped your gift, it’s time to make it shine with some finishing touches. Adding ribbons, tags, and other decorations can elevate your present and show the recipient how much you care. Here’s how to add those special details.
Tying Ribbon and Attaching Bows
Ribbons can add a beautiful touch to your wrapped gift. Start by choosing a ribbon that matches or complements your wrapping paper. A plain satin ribbon offers a classic look, while a patterned one can add playful flair.
To tie a bow, cut a generous length of ribbon. Place it around your gift and make sure it’s centered. Cross the ribbon ends at the back and pull them to the front. Make a loop with one end and wrap the other around it. Pull through to create a bow and adjust the loops and ends for uniformity. Using double-faced ribbon can make bow tying easier since the pretty side will always show.
Attaching Gift Tags and Cards
Gift tags are an excellent way to add a personal touch and inform the recipient who the gift is from. You can easily make your own tags using cardstock or buy pre-made ones.
Write a thoughtful message or simply sign your name on the tag. Use a small piece of twine or string to attach the tag to the ribbon. For a modern look, try attaching the tag with a paper clip or decorative clip for a unique touch. If you’re using a card, place it on top of the gift or inside if it’s possible.
Extra Embellishments for a Personal Touch
Adding embellishments can make your gift truly one-of-a-kind. Think about items like stickers, small ornaments, or even a sprig of greenery placed under the ribbon.
Another idea is to use fabric scraps for a rustic look. Simply tie them around the gift instead of traditional ribbon.
You might also consider adding a personal touch, like a favorite quote or a drawing, on the gift tag to make it even more special.
These little details can transform an average gift into something extraordinary, showing your thoughtfulness and creativity!